Xello securely exchanges data with
Data file export
Skyward Qmlativ exchanges data with Xello through a scripted integration. There are four data export reports to run: Course Master, Schools, Student Courses, Students. To find these files:
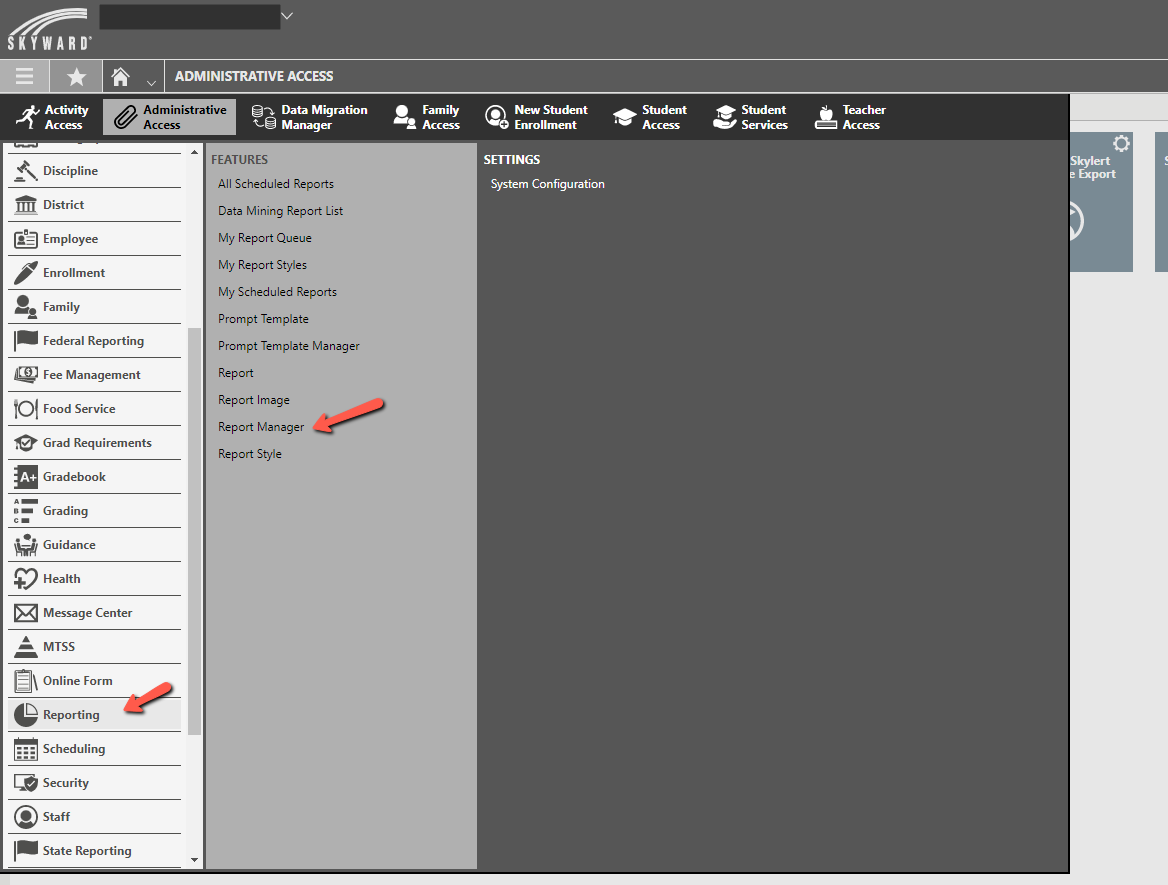
- From your Skyward Qmlativ account, click Administrative Access.
- From the left menu, click Reporting and select Report Manager.
Clone a report from Skyward
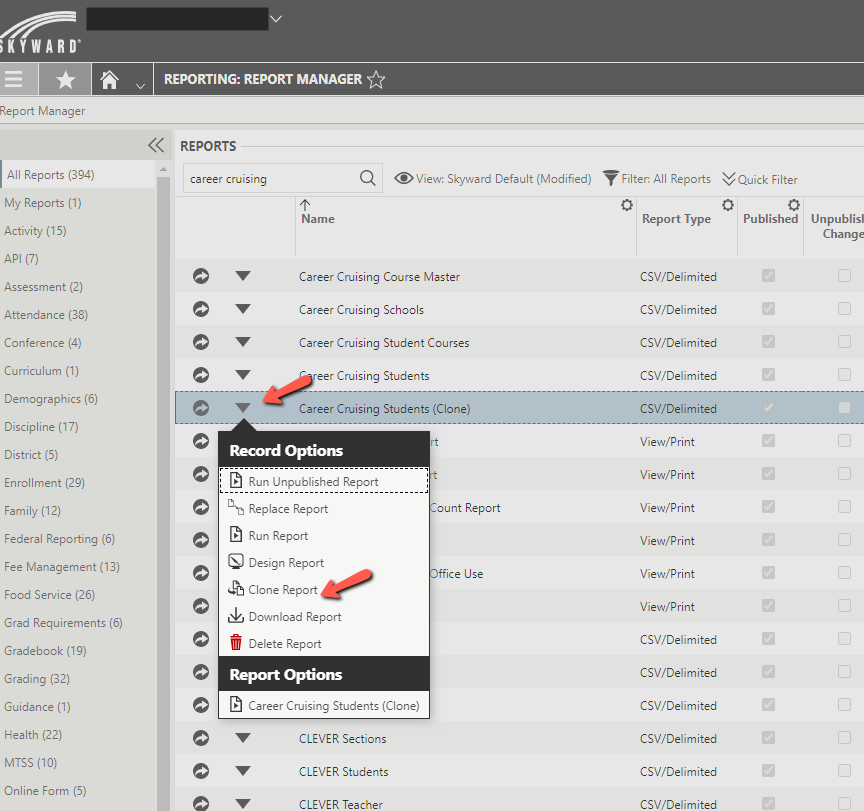
If you're migrating from Skyward to Skyward Qmlativ, there is no way to edit a report that was created by Skyward (Owner). Instead, you can clone a report and edit the fields you want to include in the file export. For example, the student number in the original report may not be the same student number as in the SIS.
To clone a report:
Schedule a report
To schedule a report in Skyward Qmlativ:
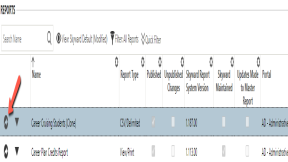
- From the Report Manager page, find the report you want to schedule.
- To the left of the report name, click the arrow icon to open the Report Details.
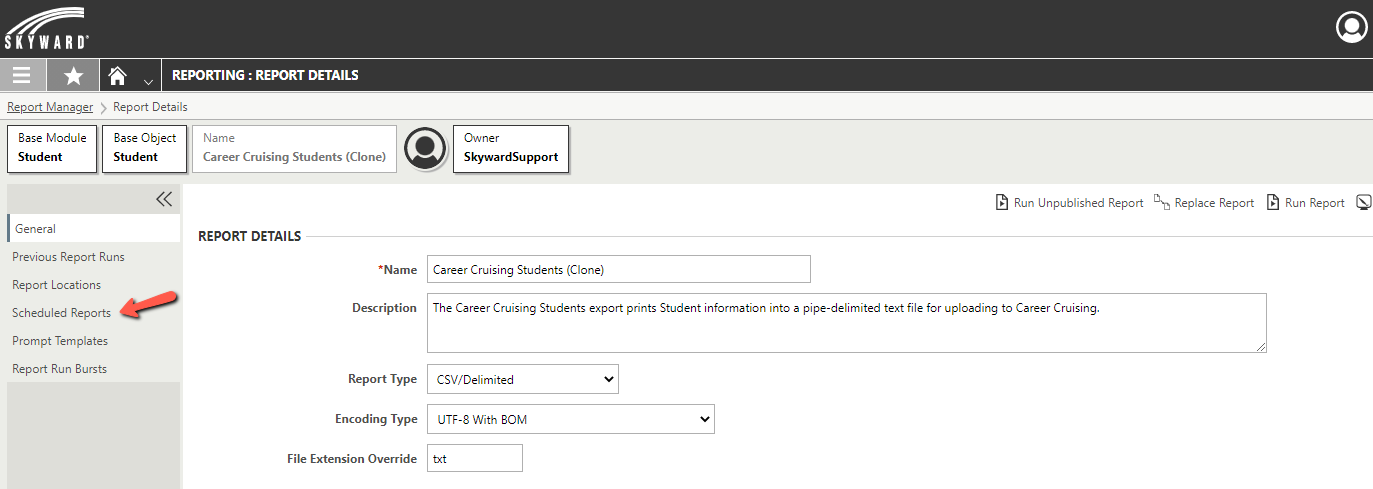
- From the left menu, click Scheduled Reports.
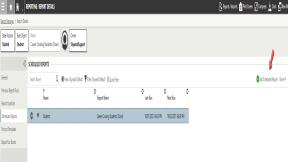
- From the top right, click Add Scheduled Report.
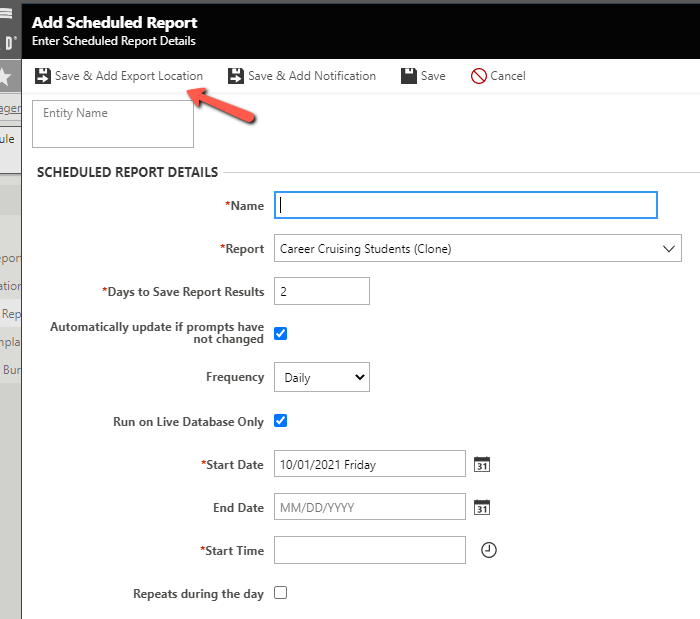
- Fill out the form details, then click Save & Add Export Location to add FTP credentials.
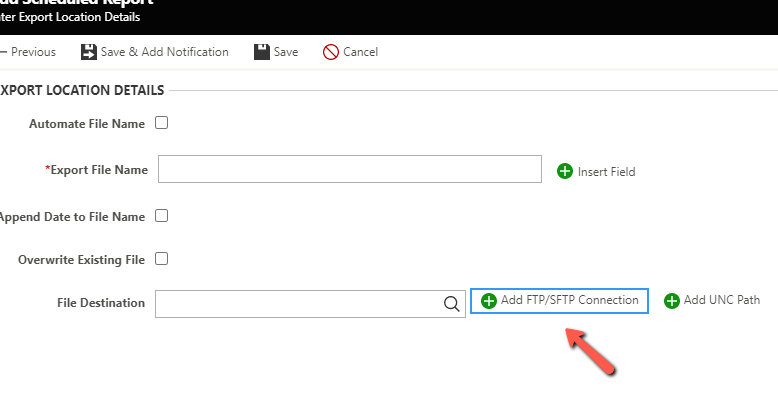
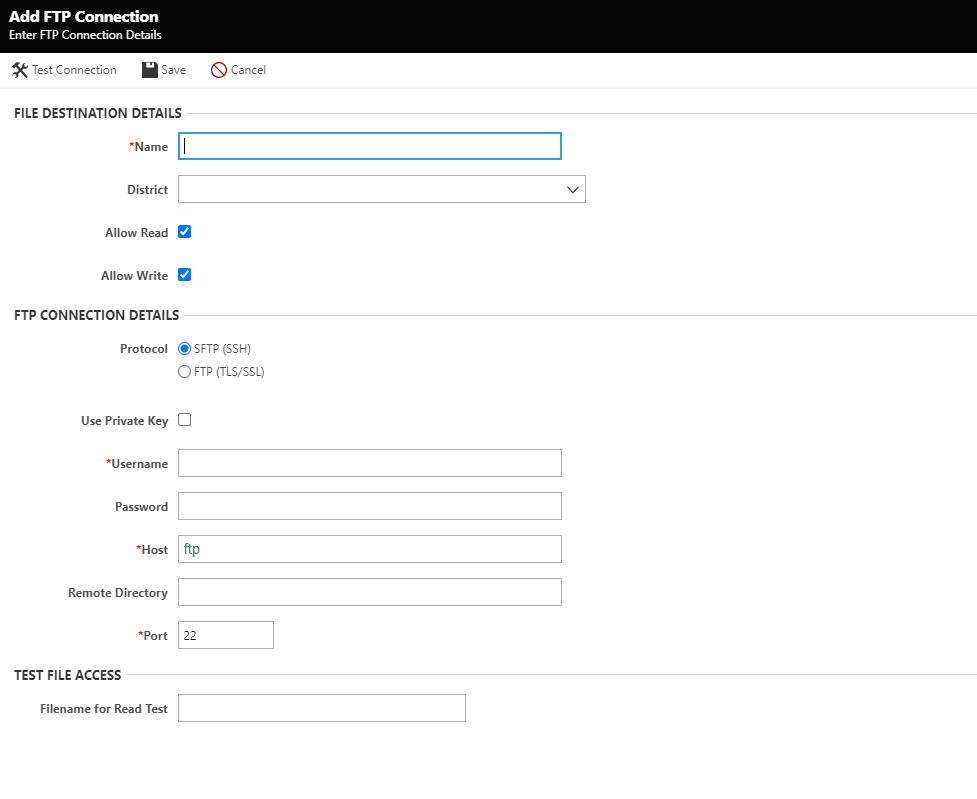
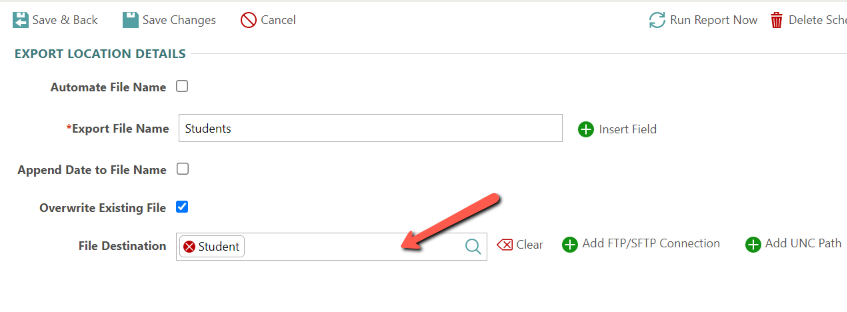
- Next to File Destination, click Add FTP/SFTP Connection.
- Enter the FTP credentials and click Save.
- The Host name is ftp
- Leave the Remote Directory field blank.
- Back on the Save & Add Export Location page, select the File Destination.
- The report will be scheduled and in queue.
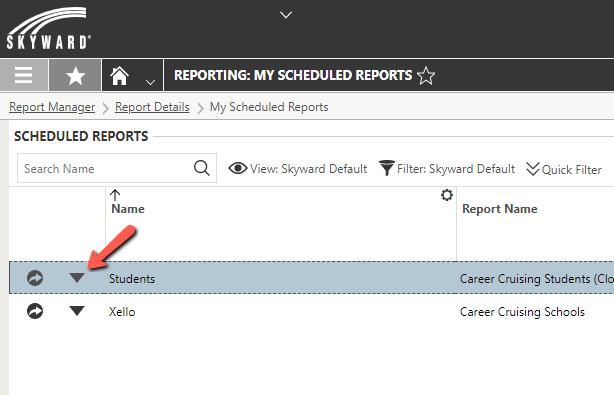
- To the left of the report name, click the down arrow and select Run Report Now.
Import course requests
You can import course requests back to the SIS with Skyward Qmlativ. Use the directions and the example .sxi file below to create the import file and generate the source file.
- Creating Import File Template
- Generating Import Source File
- Example .sxi file - Prior Import Xello Course Requests.sxi
